Showing posts with label tips. Show all posts

Wednesday 24 March 2010

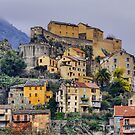
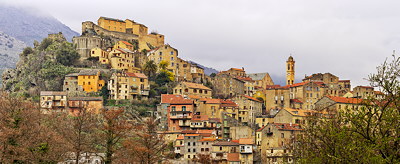
Corsica - Corte HDR panorama in the morning clouds

Corsica - Corte in the morning clouds


Some words about the making of :

This is an HDR panorama made from 6 frames with three exposures for each frames so 18 images done with a long lens where used to produce this one. The result is an about 24 megapixels file.

As most often when shooting for HDR with a long lens i used a remotre controler plus mirror lockup instead of the intervalometer function of my camera, it avoids vibrations.

The nef files where first converted to 48 bits tif files with Silkypix. The only adjustments done here where just white balance and sharpening. For color and tones i prefer to work on the entire image.

The tif files where then stitched into a real HDR file with PTGui pro.

The HDR file was tonemapped in Photomatix, i find it easier than tonemapping in PTGui.

The tonemapped resulting tif file was lastely processed with SilkyPix for tones and colors adjustments.

Note : my general tips for HDR landscapes are here.

Friday 15 January 2010

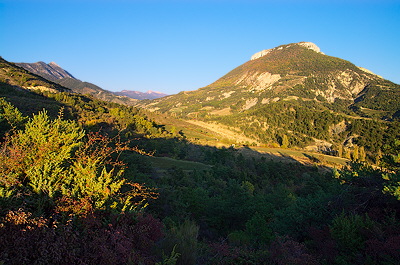
HDR in the mountains of the Oule Valley

Autumn landscape in the Oule Valley


The 3 exposures used in this image where done in 2007. I processed them yesterday with the following workflow i think i will re-use often :

- NEF files converted to TIF with Silkypix.
- TIF files combinated to a HDR file with Picturenaut.
- HDR image tonemaped with Picturenaut and saved as a new TIF file.
- HDR image tonemaped with Photomatix and saved as a second new TIF file.
- Manual blending of the two tonemaped TIFs giving most of the weight to the one done with Picturenaut.

And don't forget, you can have a look here at my general tips for HDR landscapes.


This will certainly be my last post befor our departure for Corsica on next tuesday. Tomorrow i'll start to pack all the computers, cameras and other photographic gear we need to carry ...

Tuesday 21 April 2009

A forest photo and a free powerful tool to backup your digital images

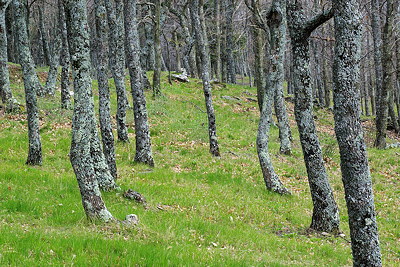
Provence forest at springtime


Managing a correct backup for digital photos is easier and cheaper than correctly archiving slides or negatives but it has to be done correctly.

Cobian Backup is certainly one of the most valuable free software i know.
All my photos are on hard drives inside my main computer and i use Cobian to copy them to some external drives.

It's a very complete software but really simple to use :

You setup some tasks with source and destination folders and when you want to backup you files you just run your tasks.

Tasks can be run manually or by an integrated automatic scheduler, they can make full or incremental or differential backups. You can define some files types you don't wan't to backup, you can use local drives, network drives or online servers as destinations (i really don't recommend to use an online server excepted if it's your own but do as you want).
Backup can be compressed or not, encrypted or not and the software can also shutdown correctly your computer when all tasks are terminated.

Another very important point : If Cobian backup has a problem with a file and can't work with it, it doesn't stops the task, it just skips the file and write the trouble he met in his log file. So when all tasks are done you can check the logs and see if all is ok or if you have some problematic files.

Wednesday 11 March 2009

A long exposure under the clouds and some tips about long exposures

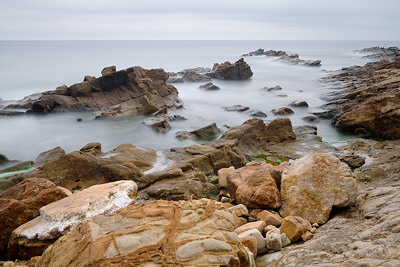
Le Pradet near Cap Garonne in Provence


An other one with the Hoya ND 400 filter giving a 90 seconds exposure in this early and cloudy morning.

Some days ago i received an email from a reader of my french website asking how to determine the exposure time in this kind of images.

On most DSLRs the exposure metering stops at 30s. What to do when you need more ?
First, if you're not familiar with long exposures you can try the scientific method :) Increase the lens aperture (decrease the number) and/or the ISO speed until you reach some values where your camera can meter. Then return to your real settings and try a little extrapolation. If your camera says 25s at f14 and ISO 400 you can try a 100s exposure at f14 and ISO 100, but it's an approximative value.
With digital and when the light is stable you can first try your scientificaly computed settings, look at the histogram and adjust. But at dusk time for example the light can decrease rapidly. If you try a 90  seconds exposure, look at the histogram and find it too much on the left you will want to try 120  seconds but  it will probably be too late and increasing the exposure length will just increase the digital noise in your files ...

So my real advice would be : try, practice, learn to know the light until you become good at guessing the right settings without iterating tries.

Thursday 10 July 2008

Long exposure in full daylight with the Hoya ND 400 filter

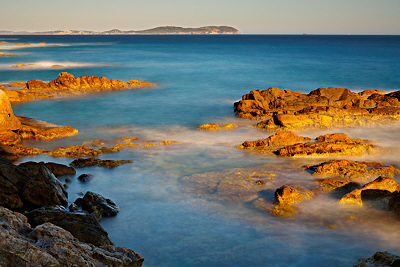
Full Mediterranean colors
Full Mediterranean colors large view


The Hoya ND 400 filter is a ND (neutral density) filter which reduces the light entering the lens by 9 f stops. That means that exposure time is multiplied by 512. In other words if your shutter speed without any filter was 1/30s, with the filter the shutter speed will be around 17s.

As you could notice, for this springtime i do many seascapes, mostly with long exposures. Without any filters, such exposure times are only possible some few moments at dawn and dusk time. The ND 400 is a good tool to increase the time available for long exposures and such shots with scenes a little more lightned can be beautiful and unusual.
Of course, with or without filter, shooting scapes at noon won't give stunning images but a strong ND filter can open some creative doors to capture beautiful lights with an unusual style.

Last point : The ND 400 is a very dark piece of glass (i could say black) and when it's on the lens you don't see anything in the viewfinder. So it's not for point and shot photography. You have to set up the tripod and the camera, frame without filter, lock everything on the tripod, install the filter, shoot, remove the filter and so on.

Monday 7 July 2008

First try of exposure fusion with PTGui Pro

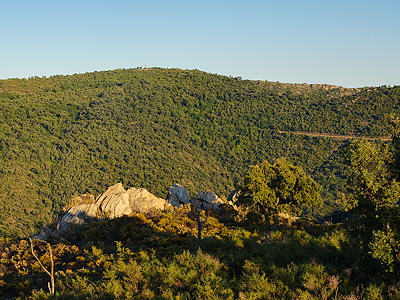
Massif des Maures landscape
Massif des Maures landscape large view here


From version 7.7, PTGui supports exposure fusion. Exposure fusion is another method to create images from scenes with High Dynamic Range. As HDR photography, exposure fusion asks to take multiple exposures of the scene but with exposure fusion no HDR image is created and so there is no need for tone mapping. So it's more easy to produce images with a natural look.

The image above was created from 3 vertical frames with 3 exposures for each.
The 9 corresponding raw files were first processed in SilkyPix and the resulting tif files stitched with PTGui Pro version 7.8.
PTGui automatically recognized the multiple exposures for each frames and made a beautiful work while blending them. Also when stitching but it's not too difficult with this kind of images.
I spent hours looking for blending/stitching errors in the resulting file but couldn't find one. Just amazing !
At the end, i just had tu use PictureWindow Pro to make some very little tweaks to this resulting file and produce the final image.

Some will say that this image is not a good example because one exposure for each frame could be enough. That's not false and i've also made the same work with only 1 exposure. But when shooting i had to slightly underexpose to keep all the details in the lighted rocks. At proccessing time when working on the shadows areas i wanted to open them a little bit. As they were corresponding to the very left part of the histogram the the result was not so rich in colors and details than in the multi exposure files...

In first conclusion i would say that PTGui can make a very beautful work with exposure fusion and can save many time with avoiding manual blending of exposures.
In the landscape context it can be a very good tool but remeber it can't make impossible things when some parts of the scene are moving (branches in the wind...)
In my day job context, i think it will save me a great time when working on interiors shots.

In second conclusion, i invite you to compare the image above with the one just under these words. It was taken at the same place just one year before. You can see that the bush's colors are not the same. It's not due to processing, it's just because this year we had some rain late in the springtime. It's less photogenic but it's really better for the forest and can protect her (little) from the fires.
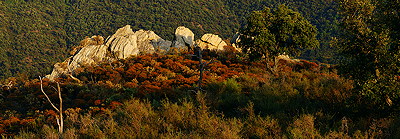
Massif des Maures landscape

Friday 13 June 2008

Tips for zoomify on blogspot

Powered by Zoomify

You can also have a look at a larger version of this image.
One of my old posts recently received some commments asking for help about Zoomify implementation on blogspot so i decided to post some tips here.

Files hosting : You need a web host for the zoomify viewer and for you image file folders. Don't try to upload them directly on blogspot, you can't do that.
On this web host, create one folder to receive the zoomifyViewer.swf file. Then, create one subfolder of this folder to receive the content of the tiles folder and the ImageProperties.xml file created by zoomify.
For the next part, we'll assume that :
  • Your web host URL is :
    http://mywebhost.com
  • The URL of the folder receiving the swf file is :
    http://mywebhost.com/zoom/
  • The URL of the folder receiving the files generated by zoomify is :
    http://mywebhost.com/zoom/image/

Code editing : Zoomify gives a Template.html file. You need to edit its content in the following way.
  • Replace the width and height values with the values you want.
  • Replace the URLs of the swf file and of the image folder with the above values.
When done, save the html file on your local machine, open it with your browser. If you have all done correctly you should have a blank page showing your image in the zoomify viewer.
If it's OK, edit again the Template.html file, remove the first 3 lines and the last 3 (html, body, div tags). Remove also the blank lines.
Blogspot doesn't like the newlines into the html tables codes. So delete them all until you have all the code on one unique line. Connect to your blogspot account, post one new message, go to the Edit HTML code tab and copy the big code line int the text area. Check the preview and it should be right :)

Monday 5 May 2008

Some tips for HDR landscapes (updated 2009/04/14)

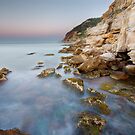
Mediterranean seascape at dawn time
Wild coast


You will find many and many HDR tutorials on the web, here are just a few more tips which can help people trying HDR photography in their landscapes works. These tips are a little about HDR theory, mostly about how to practice in the field and also a little about file processing.

1 - HDR THEORY

HDR is for High Dynamic Range and of course it can be used to photography some scenes having a too strong contrast for a common camera sensor.
Making a HDR image requires taking several exposures of the same scene and blending these different exposures with a dedicated software. The blending result is the real HDR image. Because of its high dynamic range, this HDR image can't be viewed correctly on a usual computer display and neither printed on paper.
To make a viewable photo from the HDR image you need to make it's total contrast fit the capabilities of classic digital images. This part of the process is named tonemapping. There are many tonemapping algorithms giving all some very different results. I think the most popular is the Detail Enhancer implemented in Photomatix.

Even if the overall dynamic range of the scene is not really too high for the camera sensor you can use HDR technics to improve shadows and or highlights rendition or to increase local contrasts.
You can also use the tonemapping algorithm on a single exposure to give it more power. It's just tonemapping and not HDR. It can produce some very impressive results but take care because it can also strongly enhance the defaults of the original file (noise, banding, etc).

If you want to know more about the history and theory of HDR Imaging i can just conseil you to read this Wikipedia page and also the Photomatix FAQ about HDR.

2 - IN THE FIELD
  • First and always shoot raw ! It will give you some really better files to work on during the digital processing.

  • Use a tripod, a sturdy one and don't forget to lock all the parts you can lock. It will increase image sharpness and help to avoid misalignment problems at blending time.

  • Still to avoid misalignment, try too shoot without touching the camera. Use a remote controler or the interval shooting option if your camera has one.

  • Exposure, number of frames etc :
    - On your camera, select aperture mode and choose the aperture you will use for the landscape. As for a classical landscape, the aperture will depend of your lens capabilities, your need for slow or high shutter speed, your need for DOF, etc...
    - Put your camera on spot metering and take the light in the brightest and in the darkest parts of the scene. Note the corresponding shutter speeds, compute the average and the number of IL you will need to cover all the dynamic range of the scene.
    - Put your camera in manual mode and then select the aperture you choose in first point and also the average shutter speed you have just computed.
    - Program your camera bracketing to cover the full dynamic range of the scene. If you feel limited by the bracketing capabilities, remember that one exposure captures really more than one IL :)
    The goal is to have at least one frame whith the shadows slightly overexposed and an other with the highlights slightly underexposed.

3 - DIGITAL PROCESSING

It will be a short part. I won't try to tell you how to use the Photomatix sliders, i think it all depends of your tastes and of the type of image you're working on.
  • Raw files. I usually process them with SilkyPix, save the results in 48 bits TIF files and then blend these TIF files with Photomatix.
    I find i have more control on the processing doing this way but if you don't have any raw processor you can process them directly in your HDR tool.

  • Usually, HDR softwares have an auto alignment option. If you respect all the points listed above i suggest you to try without this option. You will save time and possibly avoid some misalignment due to false software interpretation of some image points.

  • One thing we often read is that HDR images are noisy. If all the frames are correctly exposed and if you're not too crazy during tonemapping you can obtain some noise free images without using any noise reduction.
    So once more, if you want a noise free result try to expose correctly your images and skip the noise reduction option. You will save time and avoid artifacts and loss of details.

  • Chromatic aberration :
    Most of time, HDR landscapes concern scenes with high contrast and it's a nice way to test your lenses about chromatic aberrations. Speaking seriously, i would tell Make your possible to avoid and/or reduce chromatic aberrations.
    The colored fringes can be "nicely enhanced" by the "Details enhancer" algorithm of your tonemapping software and so become realy disgracious on a large print. I also think they can produce alignment errors when using an automatic alignment option at processing time.
    Today, some softwares are very good in correcting chromatic aberrations but if you can afford try tu use a lens which doesn't suffer too much of this defect.

  • Last point : Most of time the tonemapped image can be strongly improved by some slight curve tweaks in your favourite photo editing software ...
Related Posts Plugin for WordPress, Blogger...